I just set up wordpress as my website design program. They have to remap the site so it may be a week before the new website is up an running correctly. Please forgive the daylay, but it will be worth it.
Thanks Shirley
Monday, March 16, 2015
New Web Address
I just purchased a new domain name, www.tasfiberart.com. Yes, you must use the www. part to access the site. So if you were asked to be redirected, now you know why. I have yet to figured out how to access it, but then again, it is less than an hour old. Even google has to update. My vacation starts in a week and I will use some of that time to set up the website. Should be easier this time round.
Art Dolls
Here they are in all of their glory. The one in the center has batik arms and legs. Batiks work so much better for these types of dolls. Next week I will work on faces and hair. I have some ideas for clothes, but not sure exactly what I want to do.
Octoberfest
Here is Octoberfest almost completed. I just have to number her and build a frame for her. The first thing next week is that I have to buy a small miter saw and a table to make the frames.
This is a detail shot of the final handwork. I used a variegated Valdani hand dyed #12 pearl cotton. It blended quite well with the background and was the subtle look I was looking for.
UFOs
My plans for this afternoon are to work on quilting a UFO. I need to do the meandering part on Cam's Cold Blooded World. I have already done the straight stitching in the ditch. I wanted to put something different in the borders so I bought the video on the right. If you are looking for ideas in how to quilt something, this is an excellent video to own. Helen Godden is an Australian quilter who will make you laugh and teach you how to machine quilt. Her work is exquisite and award winning. I had already purchased her first video Free-Motion Quilting For Beginners, so when she came out with her second video 50 Styles of Quilting, I just had to get it. I don't usually recommend a lot of videos, but these 2 I do. I now want to play with my free-motion quilting more.
Since I finished Octoberfest and need some handwork to do at nights before I fall asleep on the couch, I thought I would work on this fellow. This is a series of flower baskets that were a part of a 2nd Saturday Sample from 2009. I have 4 more to do besides this one and it is on my UFO list to finish. Before you go rolling your eyes at me, let me explain. I have already finished 1 set of 12 blocks back in 2009. This is my second set, got a little tired of the fellows after doing the first set. Now it is time to finish these babies and put them in a quilt.
Well I'm off to clean the house before I get to quilt. Until next time. Shirley
I did make some progress this week. I finished the stems. I was going add more spirals but that seems like over kill. What I have decided to do is to add some subtle hand embroidery. Nothing heavy, just enough to add some texture to the negative space. I have a wonderful Valdani hand dyed #12 pearl cotton, the color is a green that blends in with the background. Next though is the stamens, then the background texture.
Art Dolls
Here she is folks, my first art doll form. She is UGLY. She looks better in the picture than in real life. Talk about cellulite. Man, she has it and wop sided, but she still looks better than I do naked. We won't even go there.
I have a lot of respect for people who make dolls of any type. It is not as easy as it looks. Just when I thought I had an area firmly stuff, nope, wasn't so. Plus you have to blend the stuffing or it bunches up and leaves areas not firm enough. Her legs are about 6" long and less than an inch in diameter; it took over an hour just to stuff 1 leg. Making her clothes will be much easier, she was a pain in the rear end.
I also found out why authors of doll books always say use pima cotton for the body. All other fabrics will fray and come apart when you try to turn them. Even my good quilter's cotton came apart in some places. Pima cotton has a tighter weave and can be found at heirloom shops. It's more expensive, but well worth it for the dolls. Batiks are similar to pima cotton, they also have a tighter weave than quilter's cotton. The piece in the picture is rayon, I think. It sparkled and shined really pretty, should have saved it for clothes, it can't take the stress of turning and stuffing. The doll I made out of that fabric will have some limbs made out of batik. Once I finish these 3 art dolls, never again. I love the art form but not the process. Now I may make spirit dolls, no limbs, but regular dolls, no.
To the left is my spirit doll patterns. Those are 1 piece and I can turn them much easier. Still think I will use either pima cotton or batiks to make the body, there is still stress in turning and stuffing. Those are scheduled for a later date this year.
Well, my beloved gray furball of a cat (Bobbie Jean) is meowing her head off. I think she wants to be fed, she had only a few pieces of food left in her bowl. Need to fix my own supper and then it is Adam 12 and back to stuffing dolls. Until next time.
Shirley
Sunday, March 1, 2015
My Life
For 5 days a week, I'm disguised as a sales associate at the local quilt shop. I normally work Tuesday thru Saturday. That leaves me with 2 days off, Sunday and Monday, with Monday being the day I run errands. On the days I work, I normally do a little bit of hand work before I go to bed. This leaves Sunday for the main creating. Since I'm a morning person, I get more done in the morning and am needing a nap by 2.
Where is all this going? It's an explanation of why I don't post regularly. Sometimes, I have nothing to post. The art that I create takes time to do. I usually work on several things at once, with each piece being at a different stage. I will do handwork at night after work and work on the pieces that require machine work on Sunday. It is a slow progress.
My intentions with this blog is to share my art and my creative process, not the everyday doldrums of my life; which are to get up, go to work, come home, just about to fall asleep on the couch, go to bed and start all over the next day. Very boring by the way. My life at work is my boss's business and she will tell those tales herself. Outside of a few projects that reflect both work and home (my projects inspired by work), you will not see any work related items here. Now that that is out of the way, on to new projects. Yes, new ones.
New Works
I have a few new projects in the works. Rather some old works being worked on again and stuff that has been in back of my mind for awhile. The old stuff first. The shop has a UFO program going and I decided to participate in it. I have 7 projects from my quilting days that need to be finished. One of those projects is a quilt top that goes by the name of "Cam's Cold Blooded World". It features snakes, lizards and frogs. Yesterday I went to the shop an hour early to spray and pin baste the top. My goal is to start machine quilting it today. Yes I will take a picture of it and post here when I get done. Some of my UFOs are art quilts and the rest are traditional quilts. An applique block from about 12 years ago is included in this group. It will be interesting to see if I can combine both old projects with new projects. One of the new projects I started last Sunday was art dolls. For the past 8 years or so, I have been fascinated by these little beauties. I have had the fabric set aside for these ladies for quite awhile. I finally started playing with them.
These ladies are smaller than normal, I reduced the pattern by 50%. Notice the fabric on the right. That was my first paycheck from quilting. The owner of the first shop I ever worked for, was teaching a class in FL. She asked me to help her out with the students since it was a large class. (It was also my first teaching job). When she offered to pay me, all I wanted at the time was a yard of this fabric. I have used it very sparingly for the past 15 years.
Here the ladies have been traced onto the fabric and sewn. This method, you trace the pieces onto the fabric, sew on the trace lines, cut out the piece, then depending on which piece, cut a small hole on 1 side and turn. The head pieces are only sewn on 1 side, cut out and then the face piece is sewn to the back of the head. The first time I sew the back side of the head, I sewed on the wrong side. Naturally a very small stitch is used to sew the pieces together (I used stitch length 1), so I could not rip the pieces apart, I had to retrace the pieces. Now after the pieces are sewn like this, the rest of the process is done by hand. Well I got everything cut out properly at last and I can't get the arms/hands to turn properly. In fact, I ripped the first one. It is back to the drawing board for the arms. I will use a different hand piece where the fingers are not individual pieces, but are more mitten like. That should be easier to turn. That project is scheduled to be first this morning before I get started on the quilt.
Octoberfest
Back to Octoberfest.
This is what the fiber lace looks like after the water solvable stabilizer has been removed. This was suppose to take the place of the free form crochet and be in the background. Brilliant me (not) had already sewn down the twirls and in any case, it still would not have worked. I should have free motion the quilt before I had sewn down the twirls. Never mind that I didn't think of it until afterwards. The process of a creative mind. Duh. Well I still wanted to use the fiber lace, so my next brilliant idea was to make a flower shape, and here is where the name Octoberfest went right out the door. Then again, maybe I will keep the name.
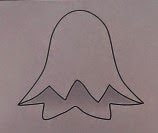
Bell shape flower
Traced on fusible webbing
The 2 pictures above are the shapes I used on the fiber lace. My next step after applying the fusible webbing to the back of the fiber lace and cutting it out was to make sure the edges would not unravel.
So I backed the bell shaped lace with 2 layers of tear away stabilizer and used a satin stitch to secure the threads.
This is the layout along with the threads to be used. The thread on the right is the stems to the flowers and the thread on the left will be used as stamens for the flower. I'm still working on the stems.